Gardening Tips
How to Grow Kousa Squash Seeds: A Beginner’s Guide
Jun
Have you ever tried growing kousa squash from seeds? This tender, nutty-flavored Middle Eastern summer squash is not only delicious, but also surprisingly easy to grow—even for beginners. If you’ve been curious about adding something new and unique to your garden lineup, kousa squash is a fantastic place to start!
With the right steps, a little patience, and some sunshine, you’ll be harvesting your own homegrown kousa squash in no time. This step-by-step guide will walk you through everything from choosing your Kousa squash seeds to picking your first fruits.
Why Grow Kousa Squash?

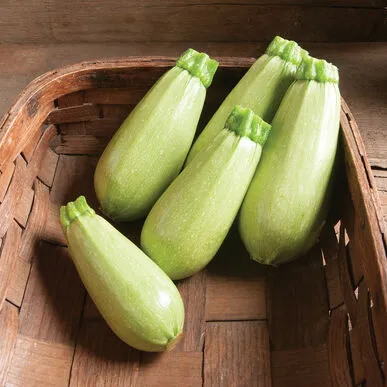
Fresh-picked kousa squash has a creamy texture and slightly nutty taste that’s perfect for stuffing, grilling, sautéing, or even adding to stews. Native to the Middle East, kousa squash (also known as gray zucchini or Lebanese squash) grows well in warm climates and adds a unique twist to traditional summer squash dishes.
Best part? It’s compact, fast-growing, and super productive—perfect for small gardens or raised beds!
Step 1: Selecting the Right Kousa Squash Seeds
Before you start planting, make sure you’ve got fresh, high-quality seeds. Kousa squash comes in several varieties, like ‘Magda,’ ‘White Lebanese,’ and the classic ‘Kousa.’ All of them have similar care needs but vary slightly in taste and skin color.
Pro Tip: Look for heirloom or non-GMO seeds from trusted suppliers. You’ll get better germination rates and healthier plants.
Step 2: Preparing the Soil
Kousa squash loves rich, well-drained soil with plenty of organic matter.
Here’s how to prep your soil:
-
Pick a sunny spot: Choose a location that gets at least 6–8 hours of full sun daily.
-
Loosen the soil: Use a garden fork to turn the soil about 8–12 inches deep. Remove rocks, weeds, and clumps.
-
Add compost: Mix in compost or aged manure to boost fertility and improve texture.
-
Check pH: Aim for a pH between 6.0 and 6.8 for best results.
Quick Tip: If your soil is heavy clay, add some sand and extra compost to improve drainage.
Step 3: Planting Kousa Squash Seeds

You’ve got options! Kousa squash can be started indoors or sown directly outside.
Direct Sowing:
-
Wait until all danger of frost has passed and the soil temperature is at least 60°F (15°C).
-
Sow seeds 1 inch deep, spacing them 18–24 inches apart in rows, or plant 2–3 seeds per hill.
-
Water gently after planting to keep the soil moist.
Starting Indoors:
-
Start seeds 2–3 weeks before your last expected frost in biodegradable pots—squash doesn’t like root disturbance.
-
Keep pots warm (70–90°F) and provide plenty of light.
-
Transplant seedlings outside after hardening them off, once nighttime temperatures stay above 55°F (13°C).
Pro Tip: Use row cover to protect young plants from pests and chilly nights—just remember to remove it before flowering so pollinators can do their job.
Read more: How to Grow Jerusalem Artichoke Seeds: A Beginner’s Guide
Step 4: Caring for Your Seedlings
Once your kousa seedlings emerge (usually within 5–10 days), your job is to keep them growing strong.
-
Light: Provide full sun or use a grow light if started indoors.
-
Water: Keep soil evenly moist but not soggy—aim for moist, crumbly soil.
-
Thinning: If multiple seeds sprout close together, snip the weaker ones so only the healthiest plant remains.
Fun Fact: Kousa seedlings are quick growers—you’ll see real leaves in a matter of days, and within two weeks, they’ll be ready to transplant!
Step 5: Transplanting and Growing Outdoors

Ready to move your seedlings outside? Let’s do it right.
Hardening off:
-
Gradually expose seedlings to outdoor conditions over 5–7 days.
-
Start with just an hour or two outdoors, increasing time daily.
Transplanting tips:
-
Plant on a warm, overcast day or in late afternoon to reduce transplant shock.
-
Space plants 2–3 feet apart and plant at the same depth as their seedling container.
-
Water deeply after planting.
Pro Tip: Adding a handful of compost to each hole before planting helps reduce stress and boosts root development.
Read more: Hardening Off Seedlings: The Ultimate Guide for Healthy Transplants
Step 6: Ongoing Care & Maintenance
Once in the ground, your kousa squash plants just need a bit of love to thrive.
Watering

Water deeply 1–2 times a week, depending on the weather. Squash plants need consistent moisture to prevent blossom-end rot and promote even fruit growth.
Quick Tip: A drip irrigation system or soaker hose saves time and keeps plants healthier.
Mulching
-
Apply mulch around plants to keep soil cool, conserve moisture, and prevent weeds.
-
Use straw, shredded leaves, or untreated grass clippings.
Fertilizing
-
Feed with a balanced fertilizer (e.g., 10-10-10) every 3–4 weeks.
-
Once flowers appear, switch to a bloom-boosting formula with more phosphorus.
Pest Prevention
-
Check leaves daily for signs of aphids, squash bugs, or cucumber beetles.
-
Use neem oil or insecticidal soap if pests appear.
-
Remove infected leaves to prevent the spread of mildew or viruses.
Pro Tip: Interplant with herbs like basil or nasturtium to attract pollinators and repel pests naturally!
Supporting (Optional)
While most kousa squash plants are bush-type, some can get a bit leggy. If space is tight, train vines gently up a small trellis or cage for better airflow and easier harvesting.
Pro Tip: Companion planting with basil or marigolds can help deter pests naturally.
Step 7: Harvesting Your Kousa Squash

Kousa squash is typically ready to harvest 45–60 days after planting.
-
When to harvest: Pick squash when they’re 4–6 inches long and feel firm. Smaller squashes are more tender and flavorful.
-
How to harvest: Use pruning shears or a sharp knife. Avoid pulling or twisting, which can damage the plant.
-
Harvest often: Frequent harvesting encourages more fruit!
Culinary tip: Kousa squash is amazing stuffed with rice and spices, lightly grilled with olive oil, or shredded into fritters and savory pancakes.
Bonus Tip: If you miss one and it gets too big, don’t toss it—save the seeds for next season!
Frequently Asked Questions (FAQ)
Q: Can I grow kousa squash in containers?
Absolutely! Use a container at least 18 inches wide and deep, with drainage holes. Choose compact varieties and be sure to feed and water regularly.
Q: My squash flowers fall off—why?
This is totally normal! Male flowers usually appear first and fall off. Once female flowers arrive, they’ll need pollination—bees usually help, but you can hand-pollinate if needed.
Q: What’s the white powder on my leaves?
That’s likely powdery mildew, a common issue. Improve air circulation, avoid overhead watering, and treat with neem oil or a baking soda spray.
Q: Can I save seeds from my kousa squash?
Yes! Let a few fruits mature fully on the plant until the skin is hard and the stem turns woody. Scoop out the seeds, rinse, and dry them thoroughly before storing.
Q: Why are my squash leaves turning yellow?
Yellowing can mean too much water, not enough nutrients, or a pest problem. Check your watering, feed with compost, and inspect for bugs.
Q: How do I prevent squash bugs?
Cover young plants with row cover, hand-pick bugs, and mulch to deter pests.
Final Thoughts
Growing kousa squash from seed is a fun, rewarding way to add a flavorful and culturally rich vegetable to your garden. Whether you’re stuffing them with rice and herbs or slicing them for the grill, there’s something satisfying about eating squash you grew yourself.
So, what are you waiting for? Grab those seeds and get growing—your garden (and your dinner plate) will thank you!
You may like: